
A couple of months ago, I came across a magazine artiicle in my monthly amateur radio magazine about the TinyGS project.
The TinyGS project consists of several nano-
The TinyGS satellites are very small (about 12” x 12” x 12”) and consist of a low powered radio transceiver, rechargeable batteries and solar panels to recharge the batteries. They are very low cost to build and relatively simple compared to most satellites.
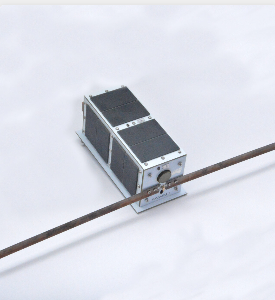
Typical TinyGS satellite
The TinyGS satellite network is mostly designed for amateur radio operators, students and experimenters. There are currenty about a dozen of these satellites currently in low earth orbit with more being deployed fairly frequently. What I find intriguing is the range that these satellites have to send and receive signals considering their relatively low radio power output. Most of the satelltes only have about one watt of transmitter power but are able to send messages that can be received up to 5,000 km away. Considering that the average cell phone has about one half of a watt of transmitting power and is limited to about five miles of range, this is amazing. The key behind the method that the satellites send and receive signals is that instead of broadcasting a standard FM radio signal (like a cell phone does), the satellites send and receive digital data “packets” at a relative low speed. Added to that is the fact that the satellites are usually in “line of sight” with the receiving station on Earth so there are few or no obstacles in the way to impede the signal.
It turns out that this is very inexpensive hobby to get in to. One can purchase the small transceiver needed to capture the satellite packets (~$25.00). The only other two things you need are a computer (Windows, Linux or Apple) and an antenna which can be purchased or home made. I’ve been experimenting with different antenna designs using copper wire and straightened coat hangers. I use a 3D printer to create a fixture for whatever type of design I’ll be building.
Shown below are a few of the different antenna if built over the last few months. Some work better than others...
Enrolling in the TinyGS network is free and consists of a mini-
Have a look at one of my stations at this URL: https://tinygs.com/station/KM6TIN_@6110445856
(feel free to click on everything to see what the various icons do-
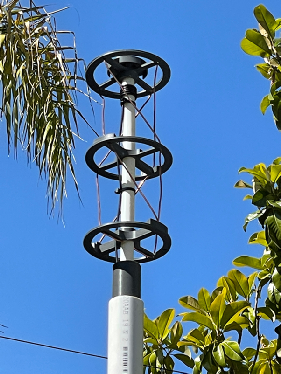
This antenna is called a Quadrifilar Helix Antenna. The main advantage of this type
of antenna is that it is omni-
Next, I tried a completely different design called and “Inverted V Dipole”. The
Inverted V is similar to “Rabbit Ears” that old school televisions used to use with
the exception that the antenna is facing horizontally instead of vertically. I found
that with this design, I was able to acquire satellite transmissions at a much great
distance than with the Helix style antenna but this style of antenna is not omni-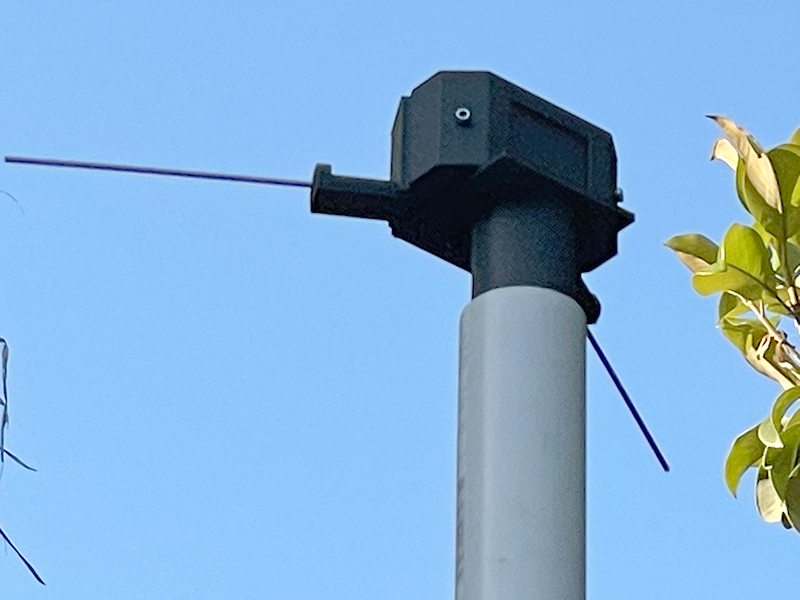 nting the antenna towards the satellite’s path becomes more critical.
